, cg
Modern Rigging Workflow: The Modular Approach
Providing solid (character) rigs that fit animators’ requirements is only a good start for a rigger aspiring to become proficient. Efficiency is the other equally important aspect so let’s discuss some leads to get there.
As a beginner I struggled to create a big picture of what could be a good rigging workflow. My only focus back then was on making my rigs robust and friendly for the animators. As soon as my object hierarchies and logic made sense, then it all sounded good enough to me.
The more I had to make some changes to the rigs I had built, the more I started to get a hint that something was wrong with my approach.
Since I would build them manually, it wasn’t straightforward to operate complex modifications on the structure. Clearly, numerous mistakes could make their way through during an update or another. I couldn’t even guarantee that the left arm of a character was the exact same as its right arm. As for propagating the changes to multiple characters, it would probably have been really challenging.
Dismembering the Rigs into Modules
Looking back at it now, the object hierarchy of my first rigs were quite a chaotic place—an arm here, a leg there, both most likely directly parented under the spine, while the controllers were mixed with rigging objects, deformers, previs geometries, and so on. The only neat part was the final geometry which was in its own hierarchy...
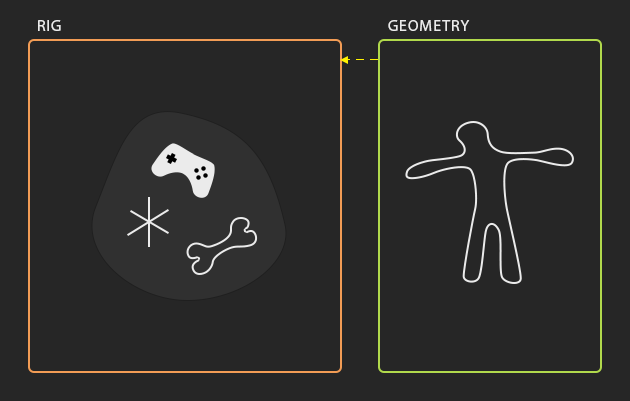
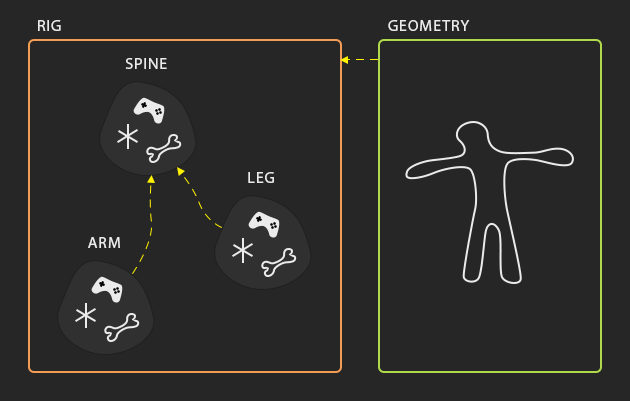
From there, the first move was to encapsulate each logical part of a rig (spine, arm, leg, ...) into its own object hierarchy, without any external element sneaking in, and to make sure that each could work in a standalone fashion. Let’s call those logical parts rig modules.
Back at Action Synthèse, we implemented this approach by saving separately a scene containing the rig for each module. A module could then be imported, fit onto a specific character, and connected to the other modules.
The fitting part was a bit sketchy—adapting a static rig existing in a scene onto different characters might require to break some constraints, expressions, and hierarchies, and to recreate them only when the sizes and posing were adjusted. We added a layer of script to help with that but this whole approach is an added complexity which is highly error prone and makes it easy to break everything apart when making changes to the rig.
Bring on the Structure
What a rig really is, is just the internals made of pistons and cogs that connect the interface given to the animators with the final deformed geometry given to the lighting department. It is only a part of a bigger picture from which we need to differentiate multiple assembly stages.
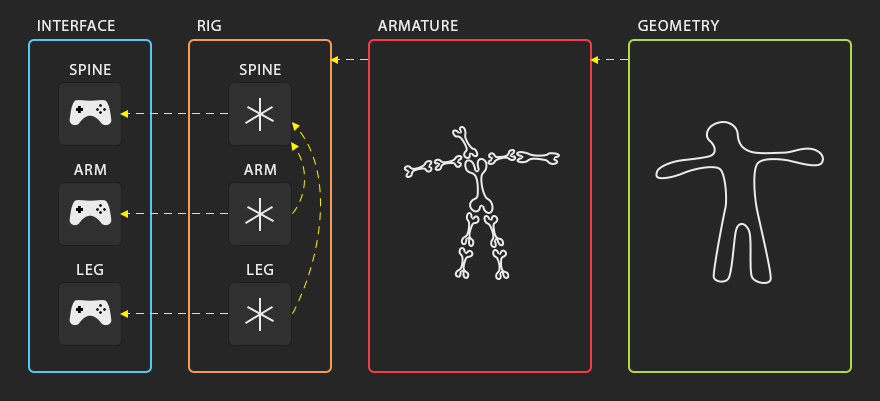
Now there’s not just one structure possible but many of them, interchangeable depending on the needs of each studio. A common and simple variation would include those units: rig, armature, and geometry.
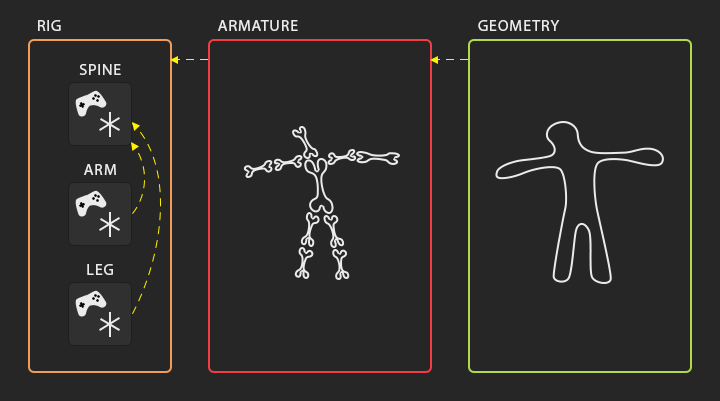
The dependencies here works only in one direction—the rig drives the armature, which in turn drives the geometry.
The armature is made of anything required to drive the deformations of the final geometry contained in the last unit. It acts like a buffer layer that usually includes a representation of the skeleton as well as any animated attribute that might end up driving shapes and other deformations.
However this structural approach is being implemented, this concept is a central piece to an efficient rigging workflow. It lays out a solid global structure for the rigs and opens the doors to much flexibility. The other building blocks just flow naturally from there.
Ideas to Make a Good Use of the Structure
A direct benefit of splitting the structure this way is that the final geometry now only requires to be driven by the armature unit. If the animation on the armature gets baked, it is then possible to provide the lighters with a lightweight asset, stripped out from the rig unit, that they can render.
In the cases where complex muscle or cloth simulations are involved, baking the final geometry for the lighters is the only viable option. But a simulation unit could well be wrapped with the armature before being sent for computation on a render farm for example. No need for the full rig here neither.
If the geometry unit prevents the animators from having a real-time feedback, an idea could be to add a new previs unit containing only “puppet” geometries to speed it all up. It could either replace entirely the geometry unit or work alongside with it by providing a visibility toggle.

Is the rig part of a motion capture pipeline? Insert a new motion capture unit that drives the controllers.
Interface and Implementation
To really emphasize the idea of a rig being a glue between the interface for the animators and the final deformed geometry, it is possible—and recommended—to split the animation controllers from the rigging logic. The programming equivalent is to separate the data from the implementation—a core design principle.
To perform this separation properly, it becomes important to fully grasp the logic of each rig module—what they require as input, how they process that data, and what they output.
The first advantage is that it’s easier to maintain both the interfaces and the rigs, especially when picking them up after a while or when someone else gets onto it. Indeed, like with programming, there’s more chances to understand small chunks of code, each encapsulated into routines getting a specific task done, rather than gigantic monolithic code snippets. Check out for example the idea behind the separations of concerns design principle if you’re not convinced.
Even more importantly, it promotes reusability by allowing to swap either a rig and/or an interface independently from the other—a same spine rig module can for example be used for a neck or a small tail, and thus by simply providing different interfaces adapted to each scenario. This could as well become convenient for when a specific shot would require to manipulate the rig in a non-conventional way.
This separation of interface and implementation doesn’t mean that any rigging system should be prohibited from within the interface. In the contrary, it’s sometimes required to build some small mechanisms to enhance the behavior of the controllers.
Adding Some More Granularity
To build more upon this separation of concerns, it’s possible to break each rig module in even smaller logical, self-contained parts. Let’s call them rig chunks.
Those allow creating some small structures that can be reused or swapped to change the behavior of a rig.
As with the rig modules forming the global structure, the chunks defining a rig module need to flow in a simple and predictable fashion.
Figuring out the right level of granularity is never easy. Starting off by turning every couple of nodes into a rig chunk under the pretext that it could possibly be reused somewhere else is definitely not the way to go and will only end up in a total clusterfuck on top of being a waste of time.
 credit: xkcd (CC BY-NC 2.5)
Instead, a solid argument to turn a piece of rig into a reusable chunk would be to build everything as usual until a same pattern shows up again—maybe in a different rig—, in which case a refactorisation is beneficial.
As for the other good argument, it’s simple—if adding/removing a part from a rig allows to add/remove features such as the stretch system for a spine, then it is more likely to be a good contender for a chunkisation.
The Point So Far
Remember how I said that the implementation of the rig modules was sketchy and complex because of the way we did it? As nice as those rig chunks might look on the paper, they won’t fare any better if implemented in the same way.
Obviously, relying on static pieces of rig to implement those dynamic concepts is quite limitative here. The fundamentals needs to be revised before being able to encompass all the current and possible future requirements.
Following the Flow, Coding It All
Each time that a concept is being isolated into a unit structure, a rig module, or a rig chunk, it really is the equivalent of creating a new function.
As such, the next step is to entirely generate the rigs through scripts. Does it freak you out? Then forget about working at Weta Digital as a rigger. Just kidding, keep reading.
Everyone there, ranging from junior to senior positions, picked it up easily enough. It is really intuitive and fast to use once all there is left to do is to type a few lines to import, configure and connect the rig modules together.
It is more involved when it comes to the lower level of creating the actual logic of each rig module and chunks, but it is for the good cause. This enforces a different approach to rigging—the encapsulation of each concept tends to be even more well-defined and modular, leading to positive restructurations of the rig elements and to a cleaner code.
Over time, it reaches a point where it becomes much more straightforward to read and understand the linear sequence of instructions from a well written code than a complex dependency graph with a ton of connections to follow, which is a specialty of Maya and the likes.
That’s only the icing on the cake but the real deal is all about being finally able to dynamically build any rig on the fly without any hack as well as being freely able to define the granularity as wished. If the code is well layed out and modular enough, this allows to create whole new variations of a rig by simply overriding a few functions.
Even better is the chance it gives to provide a flexible rig builder to the riggers. No more predefined object names, orientation orders, controllers shapes, etc. Everything becomes fully customizable to the point of also being able to define different behaviors for a same rig—should this spine be stretchable or not? Should there be 8 or 10 joints?
Note that this won’t stop anyone from creating utterly crap rigs and code if the good practices are not followed.
The Real Deal
The time for trials and errors is now over. In my opinion everything converge towards coding somehow most of the rigging workflow, but the truth being that it’s really an unnecessary pain to do this for softwares such as Maya.
Think about it. What’s happening there is that we’re creating an intermediary and unnecessary stage where we need to translate the rig logic (mathematical operations) into rig nodes specific to a 3D software.
This can quickly become a daunting task to have to create a network of interconnected nodes only to perform a few vector/matrice operations, especially since the code required for creating and connecting each node can be... substantial.
On top of that, this can cause a great performance hit. Often, transformation nodes solely exist in rigging to hold onto rotation or translation values to then drive a constraint. Such nodes still require to have their full transformation and properties to be defined and computed, and contribute to an useless clustering of the dependency graph. That’s a lot of waste of memory and processing time.
So why coding a bunch of rig nodes to process the data, when it is possible to create a much more suited piece of code that would directly process that same data optimally? Well, because we couldn’t do that easily until now—maybe with the exception of VEX from Houdini.
What’s Next?
The future is all about using the right frameworks to implement our rigging logic the way we choose to. But that wouldn’t be a good reason enough to do the switch without bringing more speed to the rigs and a good portability for the long-term run.
That’s where frameworks such as Fabric Engine kick in. With their DCC-agnostic ultra-optimized dependency graph and KL language, all the tools that we need and even more are provided.
Seeing the modularity of the workflow described in this article, I strongly believe that it’s shouting to be implemented as a nodal graph with the right level of granularity.
If you want to stay cutting edge on the rigging front, you know in which direction to head to.
Credits
Thanks to Frédéric Bonometti, Raffaele Fragapane and Andrea Interguglielmi, for all having influenced me at some point my approach to rigging.