, cg
Houdini: Wind Tunnel
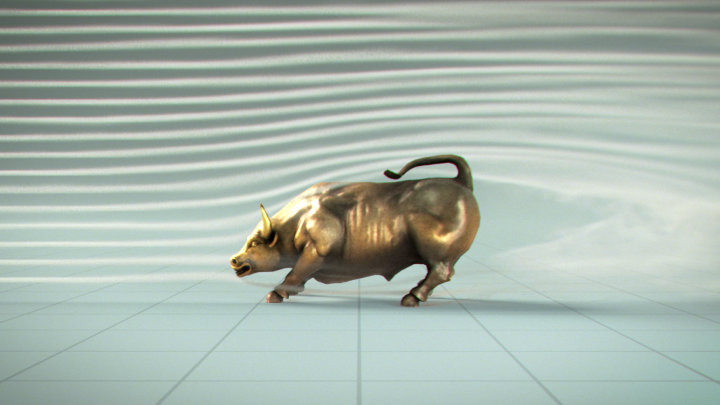
Computer graphics can help making impossible things become reality—so how about having a heavy metallic bull sculpture being pushed away by a mere 15 m/s breeze coming from within a wind tunnel? Definitely something worth making happen!
Smoke Flows Breakdown
The primary objective is to manage having the flows of smoke to look as continuous as possible.
To this purpose, the idea here is to have each flow sourced on the left side of the container from a Tube SOP whose length depends on the wind speed per simulation step rounded to the nearest voxel unit.
coefficient = fps * substeps * voxel size
wind speed per step in voxels = round(wind speed / coefficient)
adjusted wind speed = wind speed per step in voxels * coefficient
tube length = wind speed per step in voxels * voxel size
Then, the Smoke Solver DOP needs to “push” the density field towards the right to leave just enough room for some more smoke to be sourced on the left side during the next simulation step.
This is done by having the velocity field of the simulation to approximately match the adjusted wind speed at all times around the left side of the container. The Smoke Object DOP’s Wind Tunnel Direction parameter helps to do precisely that but I ended up using a custom setup instead because it seems to provide slightly better results and there’s more to learn this way, heh!
Nothing too fancy in this setup anyway—the container is initialized with the wind’s velocity and then some more velocity is added at each step in the left side. The continuous pumping of fresh new velocity is required because the advection of the velocity field by itself at each simulation step causes a loss of velocity in the sourcing area that needs to be compensated.
By this point, and with the collision source plugged in, the flows look alright but some small discontinuities are still visible in the density field. Fortunately these are minor enough to be disregarded—they are bound to disappear altogether once rendered with motion blur.
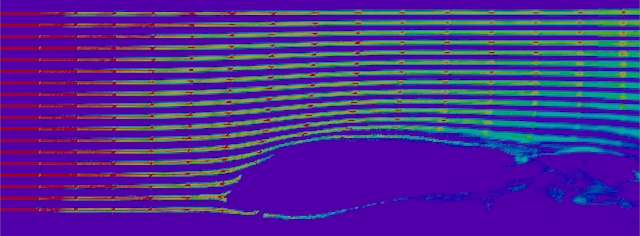 density field—some discontinuities are visible
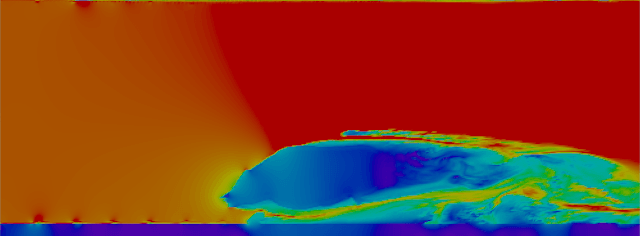 velocity field—losing a bit of steam on the front
To give a more interesting look, the linear shape of the flows is broken by adding a tiny bit of noise to the velocity source, as well as a Gas Vortex Confinement DOP to boost the swirls, and a Gas Turbulence DOP around the collision area.
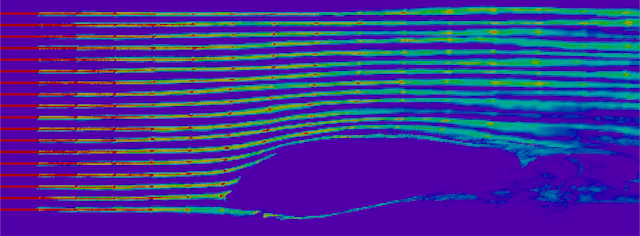 density field after breaking its linearity
Finally the simulation substeps are set to 2 simply because it brings a more interesting motion.
Dust Breakdown
Since a bull sculpture sliding in these conditions doesn’t make any sense anyway, I decided to furthermore pursue in this direction by adding a dust effect as if some dirt were, somehow, laying on the ground.[1] Yup.
To emit dust whenever the bull is sliding, a volume is first generated around the bull’s feet, near the ground, with an added pinch of noise here and there. It is then multiplied by the surrounding velocity of the bull, thus nullifying its density as the bull comes to a standstill.
The rest is even more straightforward—the volume and the points scattered from it are both advected by the velocity from the smoke flows to respectively simulate the dust particles and the dust smoke.
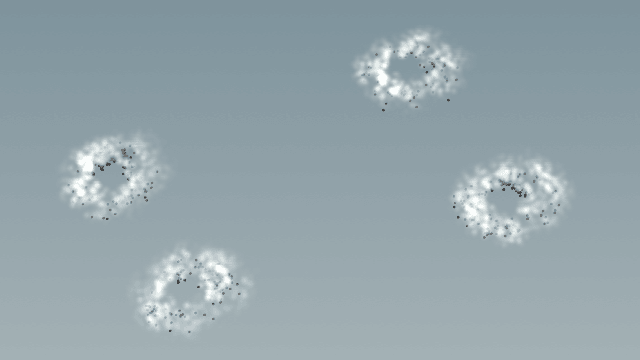 dust sources
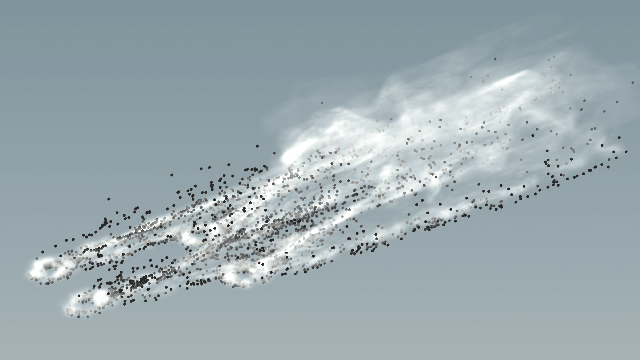 dust advection
At render time, the dust particles and smoke are set to be mostly transparent to not distract from the main effect: the smoke flows.
Download
This file contains a scene created with SideFX’s Houdini 16.5 as well as any required asset.
References
Credits
The bull model and its texture maps were created and shared under the CC Attribution-ShareAlike license by Zafio via Sketchfab.